Tuesday 21 May 2013

Design Practice 2: Evaluation

What skills have you developed through this module and how effectively do you think you have applied them?

I have defiantly learnt new skills in the way I generate concepts and how this then influences my designs. I used to look at definitions and thesaurus last year but I lost that this year until we did the workshops. It has enabled me to think more creatively about concepts, approach them differently and has informed my designs. I think I effectively applied this particularly to what is good as I initially looked into a range of ways to approach this brief e.g. packaging, exhibition etc. Then when I had chosen my direction of an exhibition, in easter I thought through lots of different concepts for what the exhibition could be. From this I chose three and sketched ideas of how the concept could be applied to different formats. This meant I was prepared for the concept crit and the feedback really informed my next decisions as well as strengthened my concepts more. By having the concept in order it meant I could strengthen it and apply it more effectively with more time to the designs and formats. This can be seen in the atheistic of my products as well as the context and format they take. Another skill is organisation as this module was aligned with a lot of others and deadlines of modules. As I had big ambitions for this project of producing several different formats, which isn't my forte, screen printing, again not my strongest and lack of experience, and stitching which is incredibly time consuming I had to manage my time effectively to make sure my other modules didn't suffer and that I met crit deadlines. I manage to organise my time without other modules suffering by booking print slots at stages and designing in order so that I produced things that needs to be screen printed first. I also printed both for screen printing and for print so that I had two types of processes but also a back up if screen printing didn't work. This meant my final pieces weren't rushed and I got to spend more time on producing them properly and solving any problems which resulted in better quality final pieces.


What approaches to methods of design production have you developed and how have they informed your design development process?

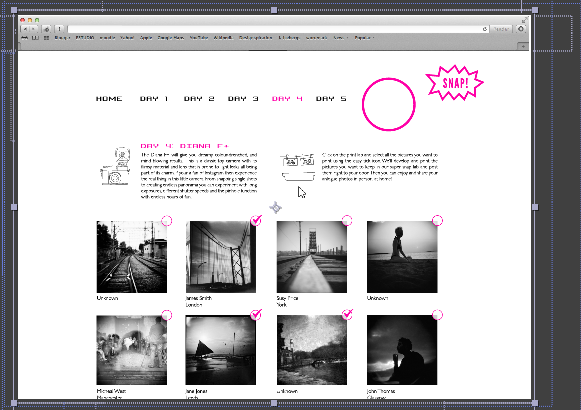
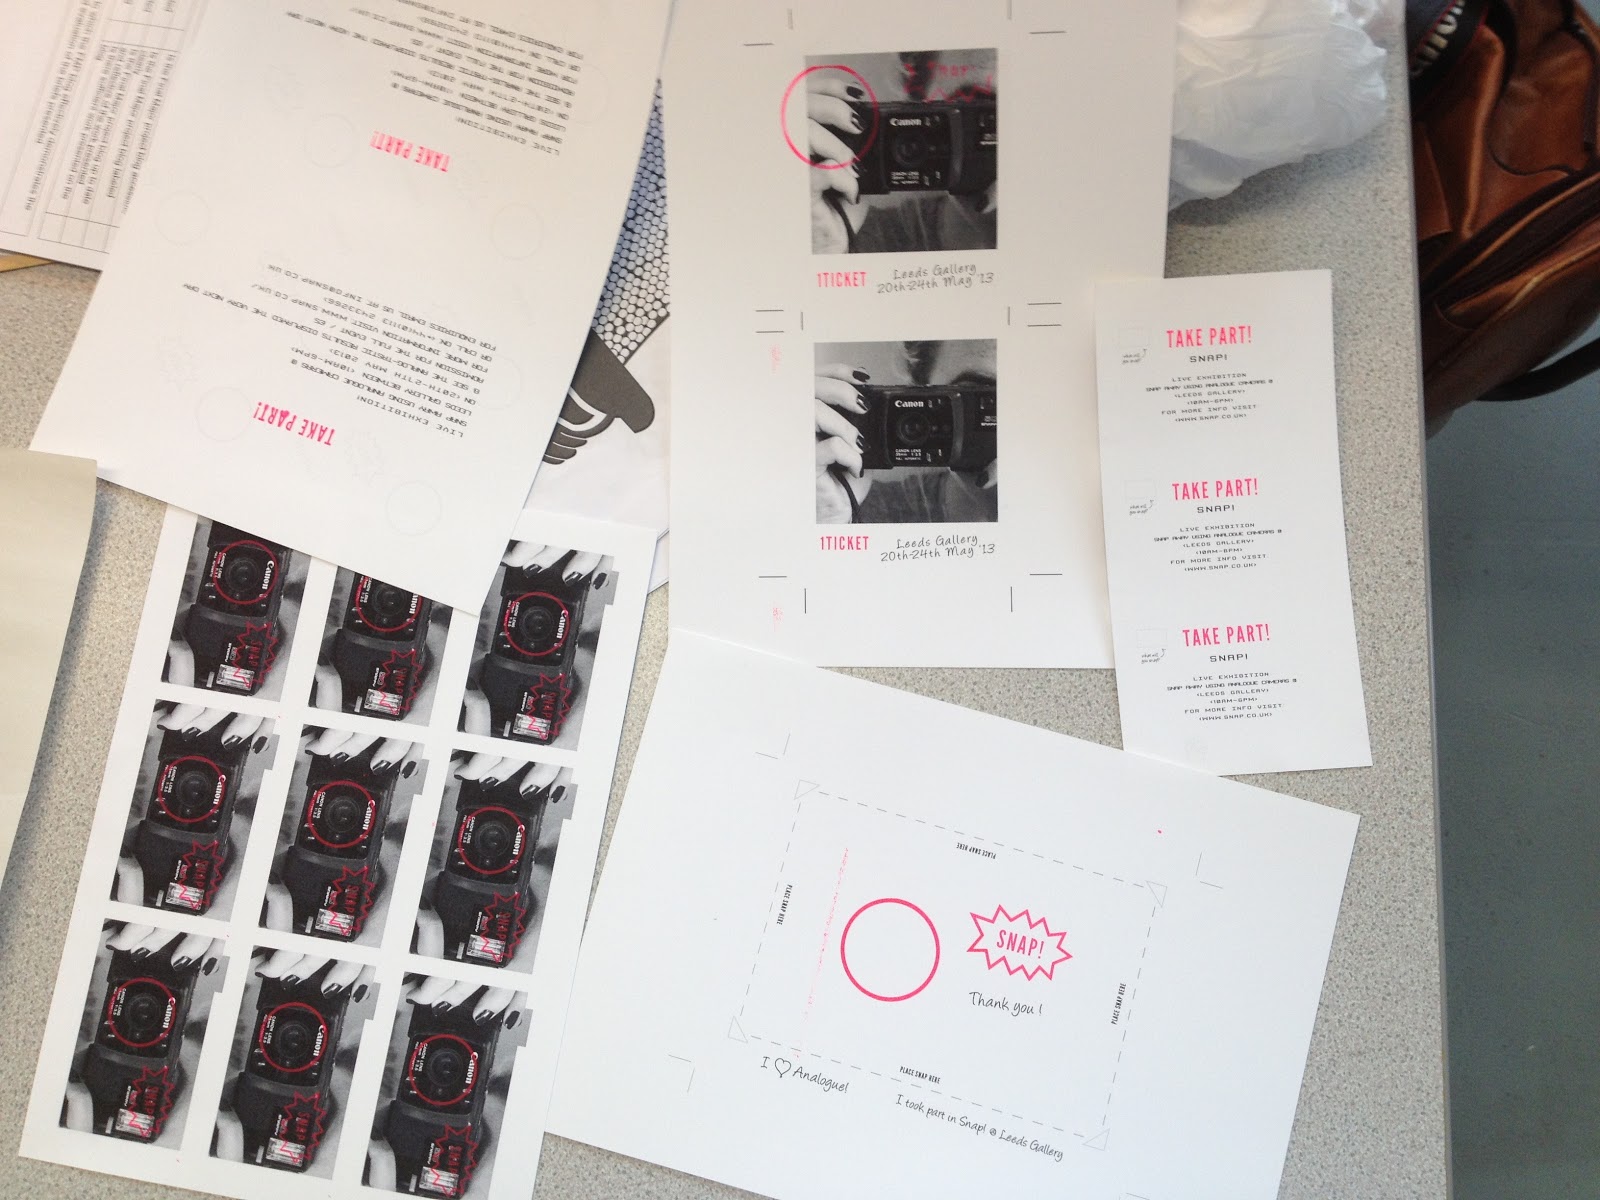
A method of design production I have developed is screen printing as I did the whole process from the beginning till end with paper and fabric. I learn to strip and coat the screens as well as expose. I also learnt some valuable lessons whilst printing like doing it quickly as the ink dries in the screen and using the trace sheet to align your screen with your paper.It has expanded my opportunities in my process as I now feel more confident about using screen printing as an option in the future. It has allowed me to be able print colours that I can't create with digital such as fluorescent or metallic which could represent a spot colour which means in future briefs my process will be more informed with a wider scope of options. I also approached my website proposal using a different mode of production. I learnt aftereffects and created a motion demo of the website being used as still images didn't show how the features worked well.  This informed my design development as I know no how to design for motion and separating the files into layers to create parts to move and others to stay still. This also means that in the future if I wanted to show something in motion I can and it will increase the quality of my website design as I can demonstrate my ideas without lots of text. I also feel I was more creative in this module in my processes as I approached the exhibition poster completely different to others. I hand stitched the poster as it was personal craft I wanted to experiment in. This has opened my mind to other processes to approach briefs instead of just print.

What strengths can you identify in your work and how have/will you capitalise on these?

I feel that a strength in this work is that I researched into a range of the topic before hand and this helped inform me in designing for the subject. My research led on to further research and encouraged new topics to look at which then meant that my concept had a backbone and a purpose with an intended audience rather than fictions for something I wanted. I will capitalise on this strength by using my research in the future to focus my concept and audience as well use it to create appropriate designs and formats.This will make my work more professional as its function and purpose will be informed and it will mean my design process with be focused and organised. Another strength in this particular work is the quality of the final outcomes. I have in the past struggle to produce final pieces how I wanted them to but due to my organisation and pre planning I was able to produce a range of products to a more professional quality. I was pleased with the results of this module and even with minor defects and mistakes, which I have learnt from, I still came out with a range of products which work together as promotional material and would be happy to use as a demonstration of my graphic skills. I capitalised on my new skill in production of products by creating a range of different formats and designing more products as I went along. In the future this strength will be useful as it means I can produce final pieces for portfolio and it will also show my design as best as possible as the concept and idea might be there but if the final pieces don't show it then I won't be able to use them. 

What weaknesses can you identify in your and work and how will you address these in the future?

One weakness I spotted in this brief is photographing my process and products. I feel that I could of showed my products to be better with proper lighting and proper demonstrations of how they would be used/worked. This would of showed the function and context of the product and given better quality finish photos to use for portfolio. In the future I will try and book the photography studio and use an slr to take the photos of my final products. I will also produce mock ups of ideas I had which didn't complete or demonstrate properly such as the massive vinyl windows. Due to concentrating on actually producing final things it meant I didn't propose or mock up things as much as I have in the past. In the future I will balance the two and produce final products and propose others. Another weakness I have identified is that I didn't try out other colour schemes when I finalised my concept I went straight from the grey to bright pink. I could of tested out other colours before defiantly going ahead just to make sure it was the best option. In the future I will explore in more detail my colour options before making a final decision.

Identify 5 things that you will do differently next time and what do you expect to gain from these?

Propose/Mock up
Expand my ideas out into a further environment and express my ideas in visuals
Photograph finals
I will get good quality photos of my final pieces to use for my portfolio
Test Colours
Do test and trails of colours so I can make an informed decisions before I do finals
Draft Boards
I feel my boards could of been more focused and thought through, in future it will create a flow in producing my idea
Expand processes further
There are still a lot of things I need to learn by experimenting from different processes and this will expand my design production and concept skills


Attendance - 5
Punctuality - 5
Motivation - 4
Commitment - 4
Quantity or work produced - 4
Quality of work produced - 4
Contribution to the group - 5

Design Practice 2: Final Boards

Design Practice 2: Research Book Final


Final research book:

I wanted to print my research book on photo paper as there sized to be a collection of prints. I went to print them at Boots so that they printed like proper photos however it didn't find the files even though they were JPEGS. The women said this happens some times because there old and that it doesn't except any other file format. Once my initial plans were ruined I brought my own photo paper and printed them myself trimming them down to the correct size. To package the research photos I used a pouch that I had got from printing my own film which I think is authentic with it's spec and writing. This is an appropriate way to display my research as the format and packaging resembles that of analogue photography.

Monday 20 May 2013

Design Practice 2: Crit Boards

These are the boards I produced for the crit that show the development from the research that I did into the practice of my final products.

Design Practice 2: Website Demo


Even though I made sure each image was a vector in the file it is slightly pixalated for some reason. Also it appeared as a different speed when creating it as my computer was lagging with all the information. Therefore when it was made into a file it sped up to it's full speed which made it appear a lot quicker than expected. However for a first attempt at aftereffects which isn't the easiest thing to catch on to I was pleased with the result and it does demo the different features you just can't read through the information. It could be said that this is the speed that users flick through things particularly if they don't read the information so it shows that the website it user friendly and easy to navigate due to the large and stand out buttons such as share that tell the user quick and easily how to navigate through.

Design Practice 2: After Effects

Due to the technicality of my website proposal and the different features it had which were interactive and in motion I decided to attempt to create a demo of the website being used. To do this I needed to learn aftereffects so I looked online and used a trusty colleague of the course to help me with the basics so I could get the hang of it. The main things I learnt to use was the opacity tool and the position tool. These allowed to me transition between the different layers and illustrator files and also create motion with the page scrolling and the mouse moving.


The main issue I had was that I had originally arranged it in illustrator just as proposals pages so when placing them into after effects it meant aligning and getting rid of the backgrounds of pages as the layer was already there from before. For example when the hands are holding the photo I had the background faded out with the hands layered over the top but when I had to use in the animation I didn't need the background as the previous clip was the background. This meant I had to separate each part of my website up into different layers or files so they could overlay without having things repeated on top of each other.


I wanted to improve on my gif of before and make the feature not only flash but appear as if a camera was being used to take the photo. To do this I had the photo flash white and fade in like the snap logo faded from bold to thin. The transition of the photos also needed to be like a camera so I thought of how you turn to take photos and that creates a motion blur. Therefore I had the photos positioned at the side and have then move in in a motion blur under a white clipping mask so you only saw it within the circle. This gave the effect of the camera moving to the right and snapping another photo.


I had to separate the fixed bar to a new layer so that when the page below 'scrolled' up it stayed fixed and layered over the top. I made the page appear as if it was scrolling by positioning at the top and moving it upwards.


I also had the demo show features such as rollover colour changes. I positioned the mouse to move to the image and when it was there the page transform from one file to another though the opacity. This appeared as if the mouse had rolled over the same image.


Although it took quite a long time and was difficult to work out I was pleased with the result it  gave in demoing the features of the website. It's not a perfect file as i'm sure the layers could be better and reduced but as I worked from creating layouts for single jpegs to an animation I feel it went well. In the future I want to create the files in the hindsight of it being an animation therefore it will be a lot more simple and planned through as a motion image.

Design Practice 2: Perforated Ticket

These pictures show the perforated ticket would work in popping out the middle section when they enter through the door. The middle would be handed back to the customer and the outside kept to scan and for reference for the staff.


Design Practice 2: Promotional Material in context

This is a sample photograph of mine to show how the photo holder would be used. I added photo corners commonly used in photo albums or handmade photo books give a more authentic atheistic for the photo holder rather than just slits for the photos to slot into. This is for the complimentary photo the customer has chosen to take home. With the photo in place it just shows the text at the photo which tells the place and exhibition as a reminder. This would be ideal for the fridge, noticeboard or to put into an album itself as a token from the experience as the holder is the size of a 7 by 5 photo.


I added vinyl to the screen printed versions of the promotional material to show how it worked with the neon ink as well as the printed.


These photos show how the mail out photo pouch would work with standard printed photographs.


Design Practice 2: Merchandise

Here are some photos to show the merchandise would be gender neutral and how the strap would fall from around the neck to appear as if it's hanging. The pink really stands out on the pale T-shirt colours which I was pleased about.


The bags work in two ways which is ideal for both genders as men tend to carry bags differently to women. Men can hold them low as if there dangling the camera from the strap. Women can hook them on there shoulder like they do there hand bags and the camera appears to loop around there shoulder.


Saturday 18 May 2013

Design Practice 2: Final Screenprints

I took a photo of the screen printed material together once trimmed down to format. I combined them with some of the printed material as not everything was screen printed. I was happy with the screen printing but I think that a less fluorescent pink would of been more what I was after as it looks quite orangey when printed on white.


Design Practice 2: Interactive Card in Context


This is an example of how the contact card would be interacted with

Friday 17 May 2013

Design Practice 2: Screenprinting

Fabric:

I wanted to screen print my merchandise T-shirts and token bags to get the true representation of the print quality rather than transfer. It would also give the neon pink I wanted in the branding.


I did a test run on a tote bag I had to see how the image would print. I wanted it to line up with the handles to that would look like the user was holding the strap of the camera. The test run went ok but more pressure had to be applied to get an even thickness throughout so I proceeded.


When I printed the first t-shirt the design was really blotchy and didn't print well at all, as it was already messed up I tried again and it was still bad. I then realised that the ink had dried in the screen in the time I had gone from one to the other as I had to pin the tshirt after doing the test.


To fix this I had to wash the screen to get rid of the dried ink and dry it again before I reprinted.


Once the screen was prepared it printed perfectly on the tote bags.


It also did on the t-shirt however the design was a lot smaller than expected and due to the style of T-shirt it cropped part of the design off. However I was pleased with the quality of print. I feel that the camera is properly to a reasonable scale and the strap could of done with going down further so that the camera fell mid way on the T-shirt.


After rewashing the screen I applied the neon pink 'snap!' to the flash of the camera. This also came out well much to my relief. I tried the design on paper also to see how the screen would print and it did ok except the pink smudged considerably.


The final prints in full: 


Paper:


I used the transparent sheet to aid my registration in placing the pink in the correct place for each format.


The neon pink came out very luminous when printed on the white however not as much on the photography but I was still pleased with the results excluding a few minor mistakes which is expected with a second time screen printing. The few mistakes consisted of the screen exposing random dots which then printed out, forgetting to recover sections I had printed when starting a new section (see the polaroid ticket) and alignment due to the double side printing being off.


This is a close up of the photo holder which printed very crisp