
To open your folder go to
Site > Manage Site > Click on the website and relocate the new user work > Click done and in the column on the left hand side you can open your files

We don't have to open stylesheet anymore because the file is linked so it gives us a sub tab
Alignment
Stylesheet:
Anything to do with the whole website should be in container

For central alignment you need to do 50% and then margin-left with minus (-) half the width

Now centrally aligned
Creating template
Convert html into a template - would normally start by making a template
If you change anything on the template it will change across the whole thing (all the pages)
To create a template you define the area that you don't want to have to recreate
Specify the areas you want to be different on every page
Navigation is consistent across website
Go to design view > click inside the first column

Editable region

Click ok

You can name the editable region - name it specifically so you no what it is
It will then show in the column

If you do it in html then you can click after column 1 and do the same

Then shows in code - tidy it up so it's easier to do

Shows in the column in design view:

Save it as a template
Change the name from index otherwise you'll be confused


Click yes
It now has an extension folder in the right hand side column of dreamweaver
Always create template first
File new

Page from template option and create
Save this as Index
Repeat until you have five pages (or selected amount of pages)

Creating links
Need to make sure images are good quality but smallest file size
Website shouldn't be over 5gb
Preparing images


Image is to big in resolution and size - resize to fit where you want
(in our first column)
It shows you what the file size was and is now
File > save for web


Shows you how long it will take to load up
Click on drop down menu to change internet speed

If you want transparancy then choose PNG - 24

Has a set compression
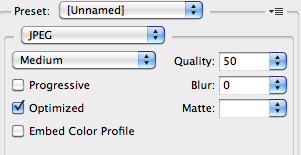
JPEG you can choose compression rate
50 quality is usually good but see how pixelated it is
Save image in image folder in root folder
Save with no spaces or punctuation
Keep the name small
Click in the column - delete the text

Alternate text - searchable by google and by law the website has to be assessable to any user like people who have partial sight - there software will read what the image is by alternate text
(the text that hovers over image)

Photoshop - creating button

Change it to the size and resolution
Transparent is best as you can specify background colour in html
Make the button however you want it to look
Duplicate layer

Save for web
PNG 24 because its transparency
Go into template
Click inside navigation bar


Choose original and rollover image
Make sure box is ticked - preloads the information - makes it instant
Make it accessible - alternate text
Browse and find your index file to link it

Repeat for all page buttons


rollover and the second image appears
No comments:
Post a Comment